Outlook 2007 To-Do
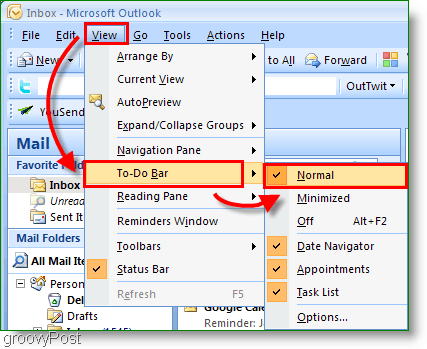
In a busy world, forgetting about an appointment or task is becoming easier and easier. Microsoft Outlook 2007 has a feature called the To-Do Bar, which I use daily to map out my day/week. It’s very configurable, includes a Calendar, my upcoming Meetings, and my Active Tasks. Although enabled by default, I like to make a few customizations to optimize fully. So here are a few tips I think you might find helpful. How-To Expand the Outlook To-Do Bar First, just in case you minimized your To-Do Bar, let’s make it visible again by setting it back to the Normal or Expanded view. This way, you can benefit from the To-Do Bar. Like all thing Microsoft, however, there are always several ways to do the same task, as shown below: 1. Click the View menu, To-Do Bar, then click Normal to set To-Do Bar to the full extended view
- Optionally, click the Double Arrows « on the far right to Expand the To-Do Bar
How-To Minimize the Outlook To-Do Bar
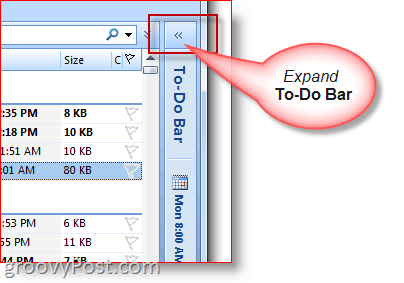
3. If you need more space for writing/reading an email, you can also quickly minimize the To-Do Bar
How-To Customize To-Do Bar Display/Options
4. Right-click the To-Do Bar Header and click the features you want to be enabled/disabled or displayed/not displayed.
Use the Outlook To-Do Bar to Create Appointments and Tasks
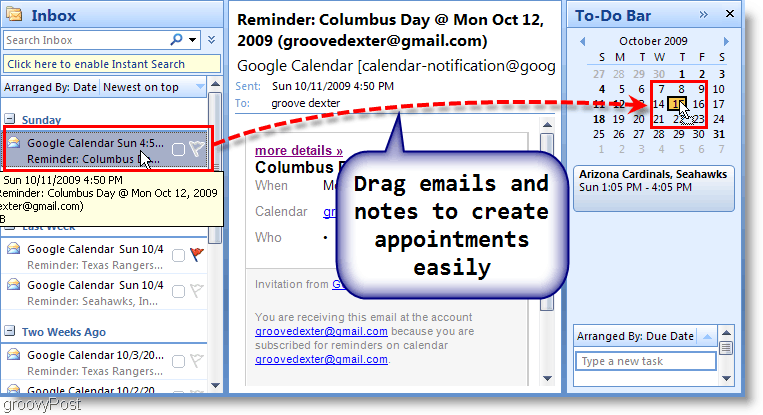
You can Drag and Drop almost any Outlook Item onto the Outlook To-Do Bar. This feature is a great time-saver! For instance, dragging and dropping an Email onto a day on the Calendar will create a new appointment using the Email as the Calendar Invite Message Body. Or, if you Drag and Drop an Outlook Contact onto the To-Do Bar calendar, it will address a new Calendar Appointment to that contact. 5. Quickly Create new Calendar Items by dragging notes, emails, contacts, or task items to the To-Do Bar calendar.
6. You can also drag an Email onto the Task Section of the To-Do Bar to create a new Task using the details from the email.
7. Another quick way to create tasks is to Type a Task directly into the To-Do Bar itself. Tasks typed in the To-Do bar will show up underneath. “Today.”
- Click the follow-up Flag to mark a task complete
9. Right-click the Follow-up Flag on the Task for the full Options Menu to do everything from adding a reminder, delete a task, set a due date, etc.
Assign and Customize Category and Colors
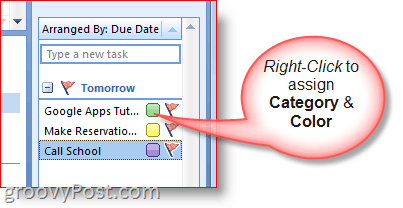
10. Right-click the Oval next to Tasks to Assign a Task to a Category and designate the Color. I base priority on color, and that works well for me.
11. For extra details on a specific date, hover over the Task or Calendar Item.
These are just a few of the key features of the Outlook 2007 To-Do Toolbar, which I use every day. I bet if you explore a little, you can find a few more great tips. Please feel free to share your favorite tip below! Comment Name * Email *
Δ Save my name and email and send me emails as new comments are made to this post.


![]()
