How-To Use Camera Raw in Bridge CS5 and Photoshop CS5 (Screencast)
How-To Use Camera Raw in Bridge CS5 and Photoshop CS5 (Step-by-Step)
Step 1 – Importing To Camera Raw
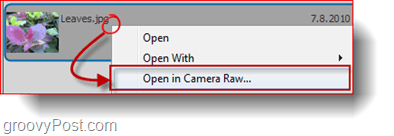
Open up Bridge and browse to the location of your image once you’ve found it; Right-Click on it and select Open in Camera Raw.
A new window will appear with your image on the left, some tools at the top, and a few sliders and settings on the right. You’ll find this interface easy to use since it is similar to the Merge To HDR Pro window interface. Start by pressing the F key on your keyboard to toggle the Full-screen Mode. This isn’t necessary but will help us see more content and data at the same time.
Step 2 – Adjusting Your Image
At the top of the window, you’ll see some tools you can use to adjust your image. Take advantage of these before you start messing around with the sliders on the right, but they are still available if you do need them later. For instance, you can Crop your image, just like the screenshot below.
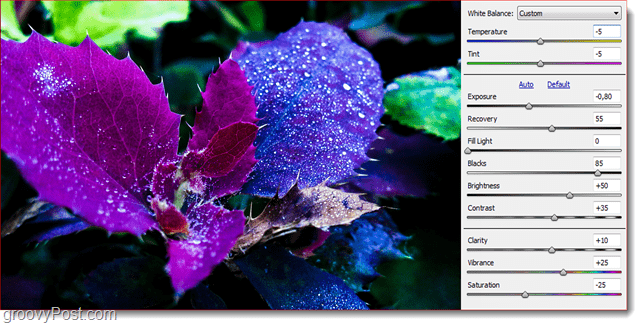
Now you can begin to adjust your image. Start with the Basic Tab which should be the currently active one by default. Move the sliders around until the image meets your preference. Here is an example below.
See that? With just a few tweaks, the image is already looking way better than the original. Now let’s Click On the next tab, which is the Tone Curve tab. From there, we can make a few more tweaks to get our image up to perfection.
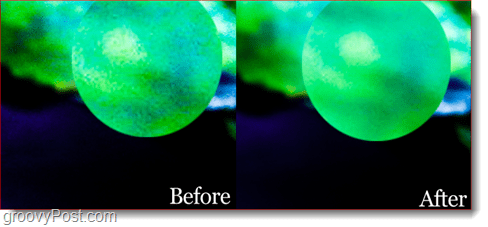
Once you’re done with Tone Curve, move on to the Sharpening Tab, from where you’ll easily get rid of any luminance noise and color noise.
Those are usually all the settings that I do to my images, but you’re free to look around the other tabs to see if you can find anything else you’d like to tweak. When you’re done, press OK to confirm.
Step 3 – Saving Your Image
Even though it will appear that the changes are saved to the image once you go back to bridge, the adjustments you just made will only be visible with Adobe Bridge and will not be shown if opened by other programs such as Windows Explorer or Mac Finder. To save your changes, Double Click on your image to open it up in Photoshop. When Camera Raw shows up again, choose Open Image to get your image loaded into Photoshop…
…and then press Ctrl+Shift+S on your keyboard to save a copy of your image (you can also replace the original with Ctrl+S).
That’s all there is to it. You’re ready to show your groovy, new, and enhanced photos to friends and amaze them with your Adobe Photoshop skills yet again. What type of photography do you prefer? Tell us in the comments section below! When i am trying to open any photo by right click . . .by Camera Raw i see a message rejected me to use Camera raw . . what is the solution to opeit smoothly ? ? ? ? Appreciate your assistance Comment Name * Email *
Δ Save my name and email and send me emails as new comments are made to this post.
![]()


